I ran across Boutis when searching on Pinterest for embroidery ideas, and immediately fell in love! Boutis is a delicate needle art that is generally used to create baby items, small quilts, accessories like lamp shades and coin purses, and occasionally women’s clothing. The designs are intricate and the most common color is white on white – meaning white fabric (often batiste), with white thread and white stuffing.
Of course, having seen it I then wanted to learn how to make it – which means diving into the deep end of the pool and thrashing around for a while until I get the basic gist.
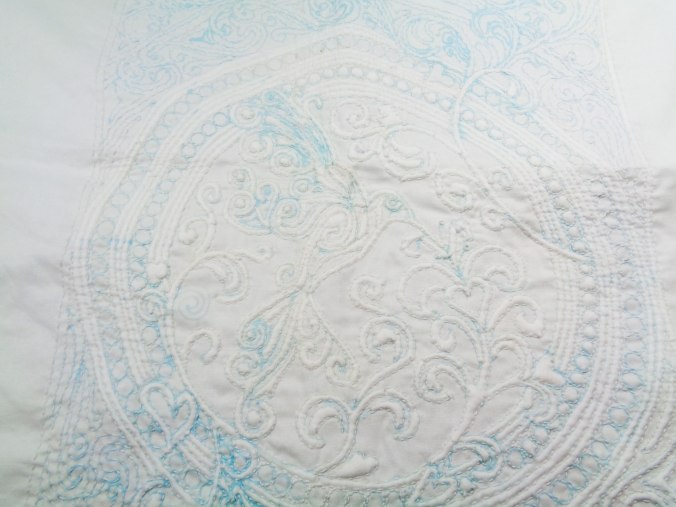
Here is a picture of my first – unfinished- attempt. I copied this pattern from Trish Burr, author of the Seams French blog.
Here is a picture of the same piece with sunlight behind it so you can better see where the cotton has been inserted into the stitched piece.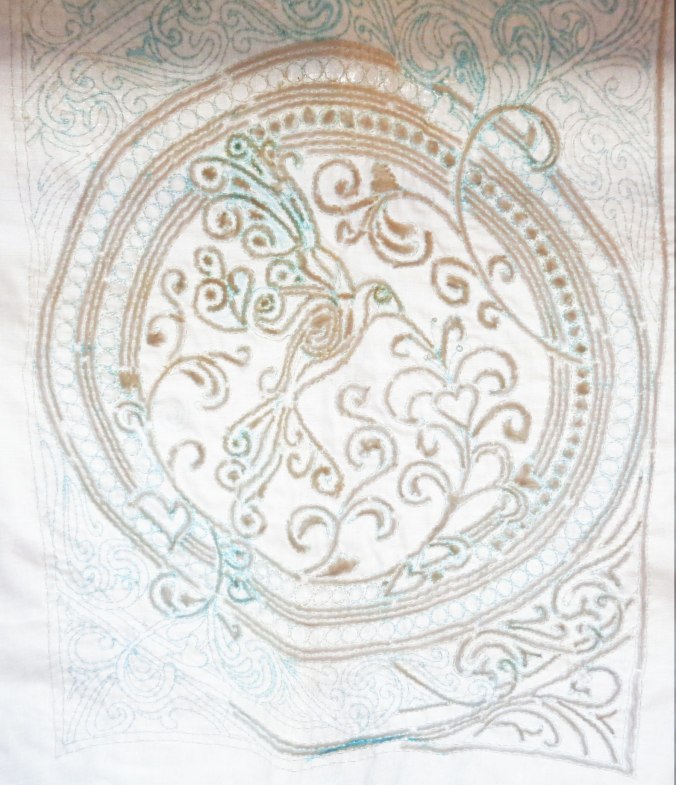
Here are the steps I took and what I learned during this experiment:
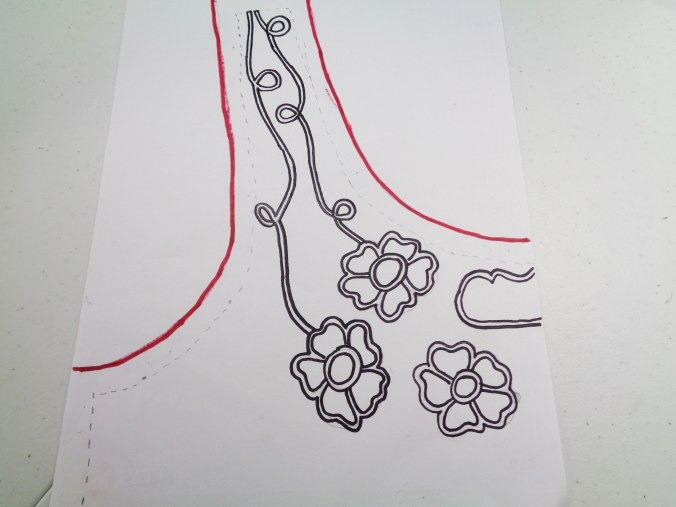
1.Create the Design: I copied the design from Trish Burr, author of the Seams French blog. I took a screen capture of her art, made some modifications to accommodate my skill level and then printed it on standard copy paper.
What I learned: do something smaller! I loved the complexity of the project (lots of shapes, turns and overlaps), but I spent too long on every step because the piece was very large. Next time I’ll find a smaller but equally complex design.
2.Transfer the Design to the Fabric: I don’t have a picture of this step, but I taped the copy paper to our glass patio doors, then taped a square piece of Batiste fabric on top. I used an embroidery transfer pen to trace the design onto my fabric.
What I learned: some needle artists swear that the blue disappearing ink is a bad idea. They claim it never totally disappears and may re-appear after a year or two. I haven’t washed this item so I can’t attest to the accuracy of this claim, but I trust the experts. Next time, I am using dressmakers chalk.
3.Stitch the Design: this part took forever! I layered two pieces of Batiste fabric together and then hand stitched over every line using Coats cotton covered bold hand quilting thread and a very fine needle. I’ve seen Boutis created with back stitches and straight stitches. I used straight stitches. In either case, the goal is to make the stitches small and even. As you can see in this photo, my stitches are relatively good: What I learned: I suck at making quilter’s knots! I eventually stopped trying to pop the knots between the layers of the fabric and decided the back would be “knotty.” I am going to do more research and practice until I conquer this task.
4.Insert the Cotton: I actually break stage this into 2 separate steps:
- Prep the Cotton: I cut an 18″ piece of cotton yarn, separate the ply and then thread the needle with the appropriate number of ply for the channel to be filled. I generally used 2 ply in my piece.
- Fill the Channels: I push the large, round tip needle through the first layer of fabric and thread the yarn along the fill area (channel). When I reach the end of the channel I push the needle out of the fabric and pull the yarn until the very end of the yarn touches the fabric. I snip the other end of the yarn as close as possible to the fabric then pull the fabric taut to draw in the ends of the yarn.
What I learned: Insert from the back! No matter how I tried, I sometimes have channels where the yarn didn’t draw completely under the fabric (see areas circled in white). The solution is to use the tip of the needle to push the yarn further into the channel. The better strategy is to insert the yarn thru the back of the fabric – not the front – so the holes and bubble of yarn are a minor annoyance, not a deal breaker. The holes usually disappear when you wash the fabric (assuming you used a dull point needle and didn’t break the weave), but why take the risk?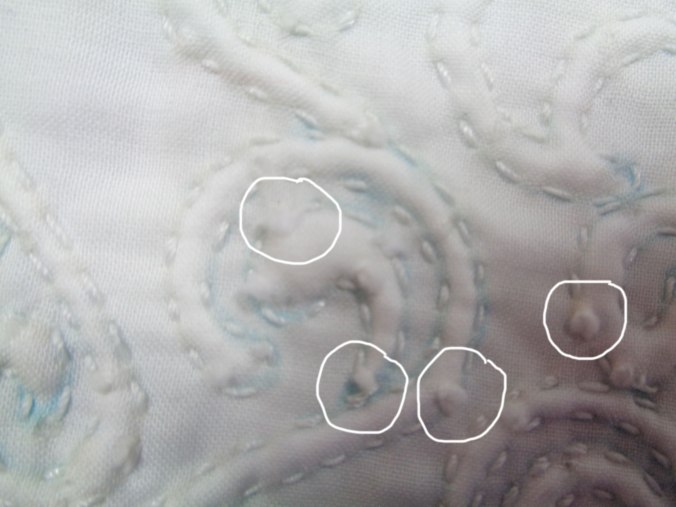
5. Finish the Project: I don’t plan on finishing this project since some of my mistakes are deal breakers but this is when I would wash and block the artwork. I plan to learn this during my next project.
Now that I have “experienced” some of the basics, I plan to practice popping knots and sketch out a novice project. So much to learn!


 Here is a close-up of the left side:
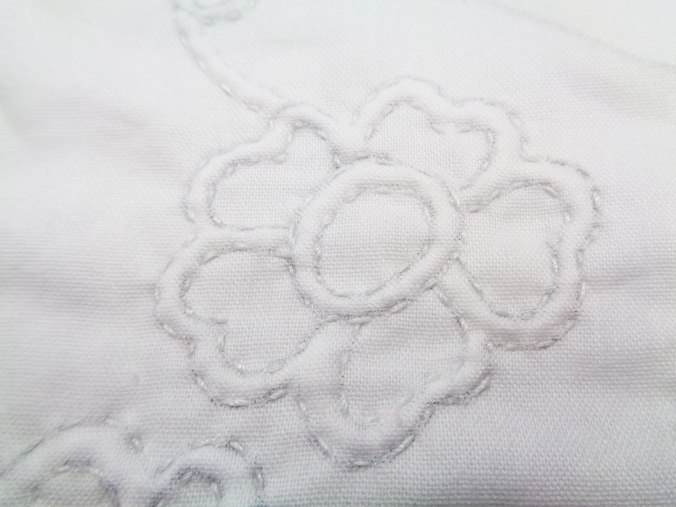 …and a close-up of the right:
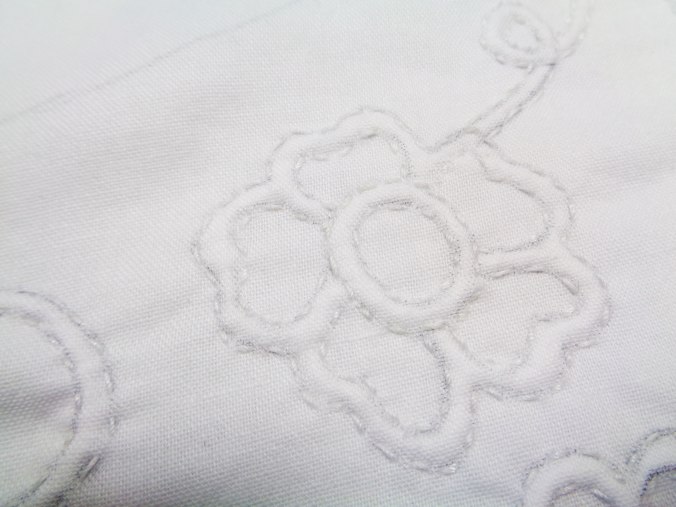 Despite the difference in lighting, the right side (stitched with the hoop) is DEFINITELY smoother and tighter.